
Setting up Nginx as a reverse proxy for Node.js App

Okay.. but what is a reverse proxy?

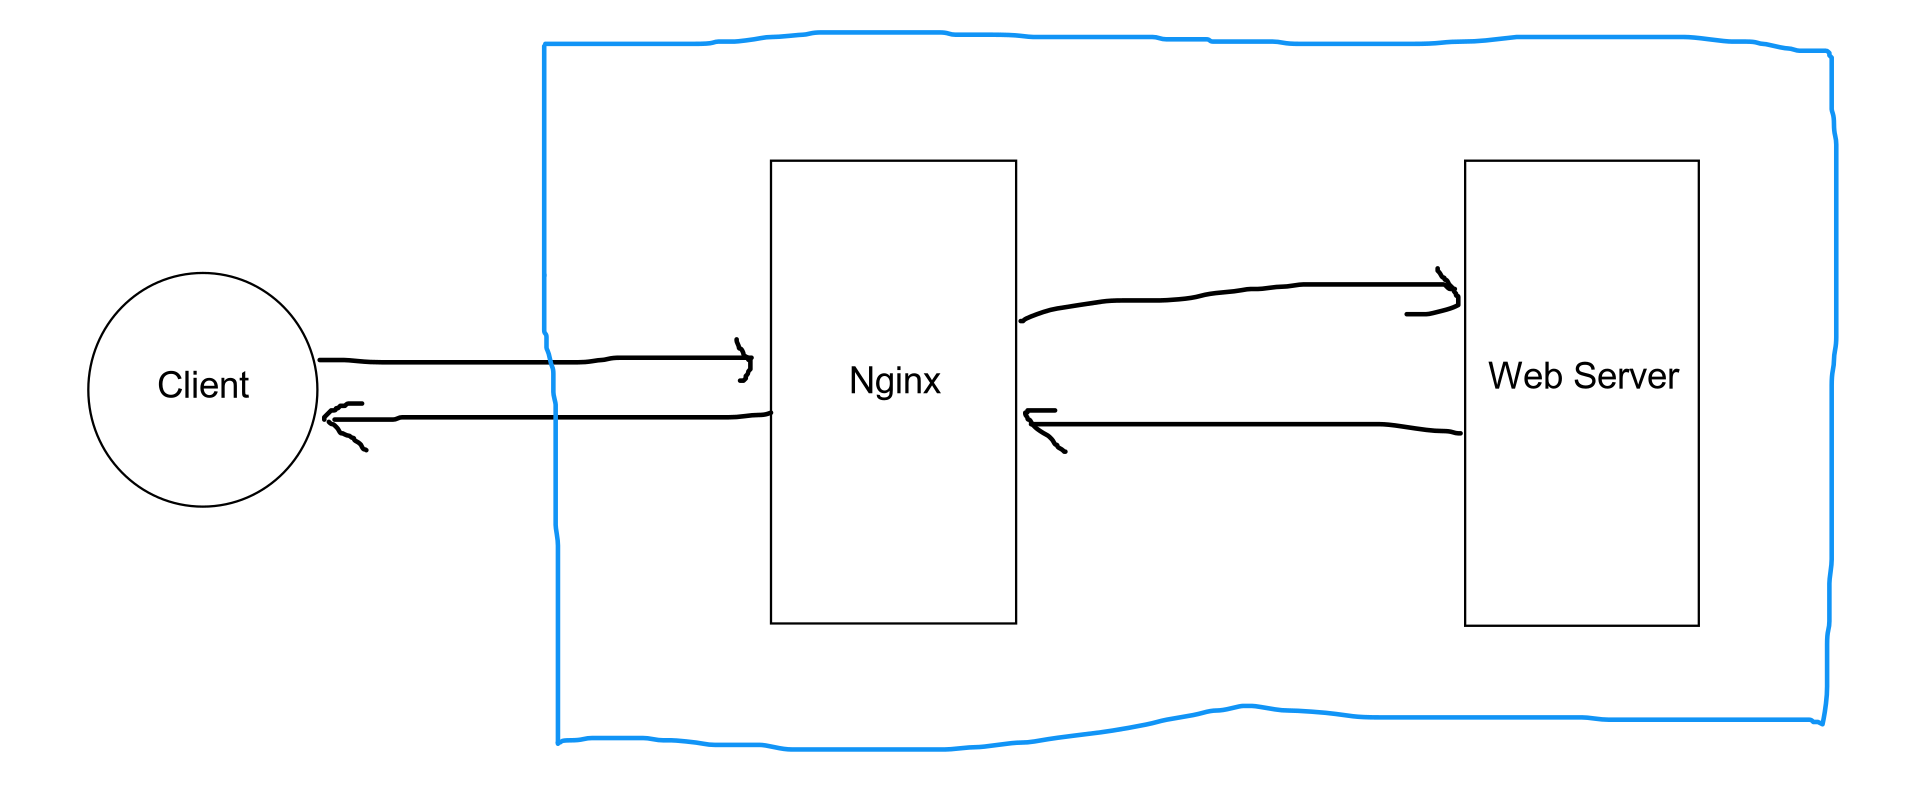
A reverse proxy is a web server that centralizes internal services and provides unified interfaces to the public. Requests from clients are forwarded to a server that can fulfill it before the reverse proxy returns the server’s response to the client.

Nginx is a popular choice to use as a reverse proxy for your node.js application.

Got it. Now let’s set up Nginx

Let’s say your nodejs server is running locally on localhost:3000.

We will set up Nginx to get the request and forward the request to our nodejs server.

Installing Nginx on ubuntu

sudo apt-get update
sudo apt-get install nginx

Configure Nginx

  1. Disable the default, virtual host
unlink /etc/nginx/sites-enabled/default

2. Create a configuration file

cd /etc/nginx/sites-available
sudo nano reverse-proxy.conf

3. Put the following content in the file

server {
listen 80;
listen [::]:80;

access_log /var/log/nginx/reverse-access.log;
error_log /var/log/nginx/reverse-error.log;

location / {
proxy_pass http://127.0.0.1:3000;
}
}

4. Create a symbolic link

ln -s /etc/nginx/sites-available/reverse-proxy.conf /etc/nginx/sites-enabled/reverse-proxy.conf

5. Test the configuration

nginx -t

6. If all good restart the server

sudo service nginx restart

Now go to localhost or localhost:80 and the request will be forwarded to the node.js application.

Congratulations our reverse proxy is successfully setup.

Image for post

If you are interested in System Design also read how to setup Load balancer in your app here:

https://blog.shashi.dev/2021/01/implementing-load-balancing-with.html

Thanks for reading. If you have some feedback, please provide your response or reach out to me on Twitter or Github.

Happy Coding!!!

Comments

  1. Betway Review - Online Gambling - Reviews and Ratings
    Betway online casino software is quite comprehensive, a reliable option for sports punters 카지노 who prefer their money back bet365 more. Betway  Rating: 7/10 · ‎Review by SlotCatalog betway

    ReplyDelete

Post a Comment

Popular posts from this blog

Track stock market information right in your Terminal.

     Introduction: As a developer, I love working with the terminal. The plain, simple, and in my opinion the best way to interact with the computer (also it makes you look geeky). I spent most of my time in the terminal. By now you must have guessed I am a huge fan of the terminal and terminal-based applications. Recently I developed an interest in stock markets and started tracking the stock markets. Since I love working with the terminal I decided to build a terminal oriented application that can help me to track the stock market. Inspir e d by  wttr.in  I build  terminal-stocks  which can provide the stock's current prices, historical prices, and global market summary. How to use terminal-stocks terminal-stocks  is available and can be used without installation. Get the current price of the stock. curl terminal-stocks.dev/ITC.NS Current price of stocks You need to provide the ticker of the stock and terminal-stocks will give you the price information of the stock.  terminal-st

RESTful CRUD API with Deno, Oak and MongoDB

In this post, we are going to build a RESTful CRUD API with Deno, Oak and MongoDB as database. In the previous article, we discussed how to install deno in your local machine and start using Deno. If you haven’t read that article, please read the article below and install the deno first. Getting started with Deno, Your first app Hello Deno. Let's install Deno. Deno ships as a single executable with no dependencies. You can install it using the installers… blog.shashi.dev After installing the Deno, we will start building the restful crud api’s. We will use o ak  microframework. Some of the other deno microframeworks are: abc deno-drash deno-express oak pogo servest In this article we will be using oak, which is inspired by koa. Setting up the project: Create a new directory called  restful-api-deno mkdir restful-api-deno 2. After c r eating the directory just  cd  into the directory cd restful-api-deno 3. Create a new file  server.ts  and paste the following code init. import { Ap