
As a developer, I love working with the terminal. The plain, simple, and in my opinion the best way to interact with the computer (also it makes you look geeky).
I spent most of my time in the terminal. By now you must have guessed I am a huge fan of the terminal and terminal-based applications.
Recently I developed an interest in stock markets and started tracking the stock markets. Since I love working with the terminal I decided to build a terminal oriented application that can help me to track the stock market.
Inspired by wttr.in I build terminal-stocks which can provide the stock's current prices, historical prices, and global market summary.
How to use terminal-stocks
terminal-stocks is available and can be used without installation.
- Get the current price of the stock.
curl terminal-stocks.dev/ITC.NS

You need to provide the ticker of the stock and terminal-stocks will give you the price information of the stock. terminal-stocks uses yahoo finance’s ticker to fetch stock information.
2. Get the historical prices of a stock.
curl terminal-stocks.dev/historical/ITC.NS

This will give the 10 entries. To fetch more you can get it by providing page parameters like below.
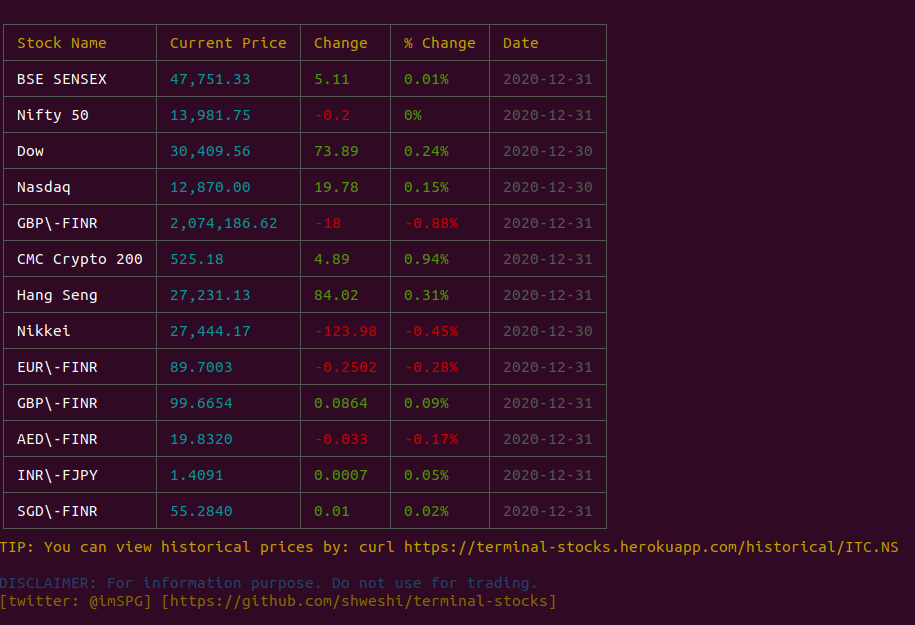
curl terminal-stocks.dev/historical/ITC.NS?page=23. Get the global market summary right in your terminal.
curl terminal-stocks.dev/market-summary
More and more features will be added going forward.
How to use terminal-stocks as CLI
If you want to use terminal-stocks as a cli tool, you are lucky, terminal-stocks comes with cli as well. You can install terminal-stocks in windows/ubuntu/mac and use it.
- Install terminal-stocks from npm
npm install terminal-stocks -g2. Get the price information of stock
terminal-stocks -t ITC.NS3. Get the historical price information of stock
terminal-stocks -t ITC.NS --historical4. Get the market summary
terminal-stocks --market5. Export as JSON or CSV
terminal-stocks --market --json // as a jsonterminal-stocks --ticker ITC.NS --csv // as a csv
Roadmap
terminal-stocks is still in development and need a lot of improvements and feature development.
- Add stock price chart right in the terminal.
- Add live price for stocks.
- Add support to maintain portfolio and track p&l right in terminal.
If you want to contribute and make terminal-stocks better, contributions are welcome via pull request on Github

Comments
Post a Comment