I have used Google Chrome for the last 5–6 years, Chrome was the perfect browser and it has many features like syncing everything across the platform and devices, bookmarks, history, lots of extensions, password manager, auto-complete, developer options to name a few.
All of these in with just a Google Id. Google ecosystem is very rich and useful.
So why I decided to switch to Brave browser after giving it a trial for a month.
Although chrome has everything, there were few issues that led me to hunt for a new browser and finally switched to Brave.
Why Brave?
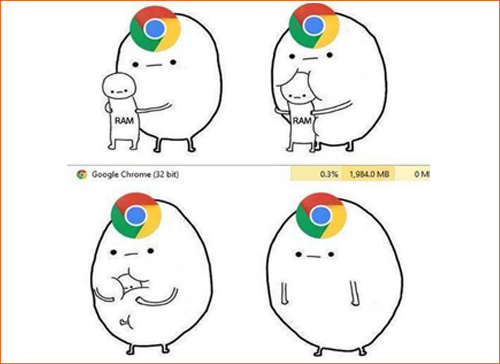
1. Chrome hogs the RAM

“Aw, Snap! Google Chrome ran out of memory while trying to display this webpage.”
I am sure you might have seen this message. This message appears when chrome has eaten all of the available RAM memory. I understand the reason behind Chrome using a lot of memory because of its architecture. It runs all the tabs in a separate process so that it can provide isolation.
Modern sites and designers/developers inject a lot of 3rd party content like ads, trackers, etc. All this makes the web pages very heavy and memory consuming, and thus creating performance issues. This issue can be resolved by installing adblocks, blocking the trackers, etc. Chrome itself does more than I needed, it's a Google product and it tracks every movement, keeps track of everything, and collecting data. I was looking for a browser that does not show me ads everywhere and tracking my each and every activity, and here comes the Brave, it's Brave’s default functionality to block all these.
2. Privacy
Chrome is built by Google, so obviously it collects all the data it can. Google generates revenue by Advertising. For the advertising to be effecting it has to be targetted to users. Which means showing me the ads which are interesting to me. To send the right ads to the right users you need to know about the interests of the users. That means tracking the user finding out where the user spends his time online, what kind of websites the user is browsing etc.
I was okay with this since it’s somewhat useful also. You get the stuff you are interested in. But slowly this behavior is getting very aggressive.
Brave is built around privacy and security in mind. That means it doesn’t follow and track you around the web.
Since it blocks all those trackers and ads Brave has a better performance too.
3. Performance
Although I haven’t done benchmarking of the performance between Chrome and Brave. But since Brave doesn’t do all the unnecessary stuff it is relatively faster than Chrome. I read few articles where people have done a performance comparison between Chrome and Brave and find out Brave has better performance than Chrome.
My personal experience after using Brave for a month is that I have felt that webpages load faster in Brave. I have experienced a better performance from Brave than Chrome.
4. User Interface
Brave is built on top of chromium so the look and feel of Brave browser are as same as Chrome. So there is almost no learning curve. The User Interface is very much the same as Chrome. The bookmark bar, settings, developers tools all pretty much same. I didn’t even miss the Chrome.
5. Compatibility
Few things I was concerned about initially were bookmarks and sync between devices (web and mobile). I had a lot of bookmarks stored in Chrome which I had collected over the years. I don’t want to lose them, but to my surprise Brave lets, you import your bookmarks from Chrome and other browsers. However, you can not import passwords. You can also install your favorite extensions in the Brave.
Also, you can enable sync and it will sync between mobile and web.
It also has the password manager, auto-complete, password auto-fill which I really like in Chrome.
6. Brave Rewards
I read a lot of articles, blogs, youtube videos, and other stuff on the web. Using Brave browser means it will block all the ads that are shown in those blog posts and articles. This means the creator and writers will not get the money they were getting by placing the ads on their blogs.
This is a problem, but Brave has a nice model to solve this issue called Brave Rewards.
Instead of showing ads and require you to click on those ads, Brave automatically and anonymously calculates the amount of attention the user gives to each web page user visits. Every month Brave rewards program will pay those websites user visits.
Users can also directly tip the websites/creator you want to support.
Brave uses cryptocurrency built on top of blockchain called BAT (Basic Attention Token).
Conclusion
When I first heard about the Brave browser I thought it may be just a replica/copy of Chromium, but after using it for a while I really liked the Brave browser. It’s now my part of daily life and I don’t really miss Chrome.
If you want to switch from Chrome to another browser or just want to experiment with a new browser then Brave will be worth trying.
Trivia:
Brave Software was co-founded by Brendan Eich, co-founder of Mozilla and creator of JavaScript


Pakistan no.1 Article in my softcrackersstore.com site Now just 1 click to download!
ReplyDeleteFinal Cut Pro X Crack
Brave Browser Crack
ReplyDeleteYou may even see our place for more Crack Software.
Excellent job with the difficult job you keep done I enjoy your work gratitude for transferring it.
Pretty great post. I simply stumbled upon your blog and wanted to mention that I have really loved surfing around your blog posts. Great set of tips from the master himself. Excellent ideas. Thanks for Awesome tips Keep it
ReplyDeletebrave-browser-crack